 Gil’s Garage
Gil Baumgartner
CTCI Authenticity Chairman
If you own a Thunderbird long enough sooner or later it will be necessary to replace the intake manifold gaskets. A few simple steps will enhance the replacement to insure a perfect seal preventing a vacuum leak. Removing and replacement of the manifold is a straight forward procedure therefore I will not attempt to explain how to unbolt and reinstall the manifold. I will point out important steps that should not be overlooked.
Photo 1 – Shows an intake manifold that has been resurfaced for a perfect fit. It is very important that the mating surface of the intake to cylinder head is not distorted. Engine machine shops have the capability to resurface the manifold.
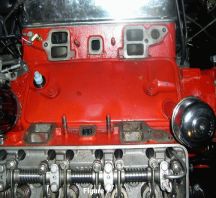
Photo 2 – The cylinder head mating surface must be clean, smooth and not pitted before the intake manifold is installed.
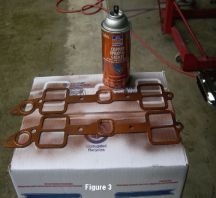
Photo 3 – I do not recommend a silicon type sealant on the intake manifold. It is best to use a copper spray sealant. The type shown is made by Permatex available at most automotive parts stores. In a push an aluminum base paint can also be used. Spray two – three coats of the sealant on each side of the gasket letting it tack to almost dry between coats and before installation.
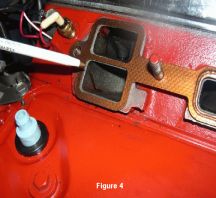
Photo 4 – Before installing the manifold insure the gaskets are installed on the correct ports. Check them closely because they can be flipped over and miss aligned very easily. After proper gasket alignment install the manifold and torque to proper specs.

Gil